Subscribe Us

This is default featured slide 1 title

Go to Blogger edit html and find these sentences.Now replace these sentences with your own descriptions.

This is default featured slide 2 title

Go to Blogger edit html and find these sentences.Now replace these sentences with your own descriptions.

This is default featured slide 3 title

Go to Blogger edit html and find these sentences.Now replace these sentences with your own descriptions.

This is default featured slide 4 title

Go to Blogger edit html and find these sentences.Now replace these sentences with your own descriptions.

This is default featured slide 5 title

Go to Blogger edit html and find these sentences.Now replace these sentences with your own descriptions.

How To Disable Laptop Keyboard Permanently


Solution 1 – Disable the Laptop keyboard using gpedit

This method will permanently disable the laptop keyboard. But, before you do so you will need these things-

Requirements~

a. At first, detach the external keyboard device with the computer.

Step 1: Press the Windows key + X together on your keyboard and select Device Manager from the context menu.


Start Right Click Device Manager


Step 2: In the Device Manager window, scroll down and expand Keyboards. Under this, right-click on the Standard PS/2 Keyboard and click on  Uninstall Device.


Uninstall Keyboard


Step 3: Now, your keyboard is disabled until you restart your laptop. Once it starts again, it will automatically be reinstalled.

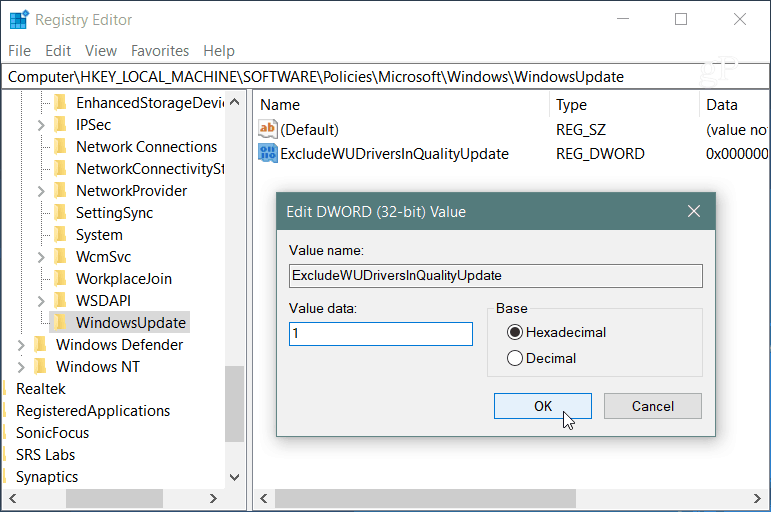
To disable it permanently, you have to disable the auto driver reinstall feature in windows 10, although not recommended as it enables auto driver updates with time.

STEP – 1 Disable particular policy 

Disabling a particular policy can solve this issue.

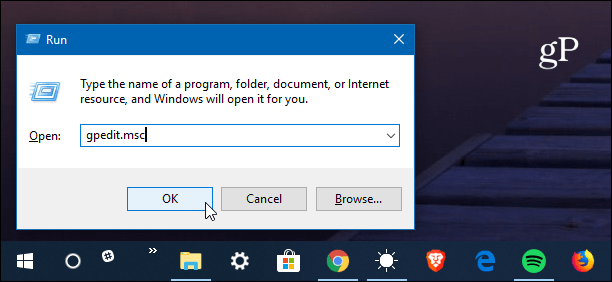
1. Press Windows key+R to access the Run window.

2. In the Run window, type “gpedit.msc“. Click on “OK“.


ADVERTISEMENT


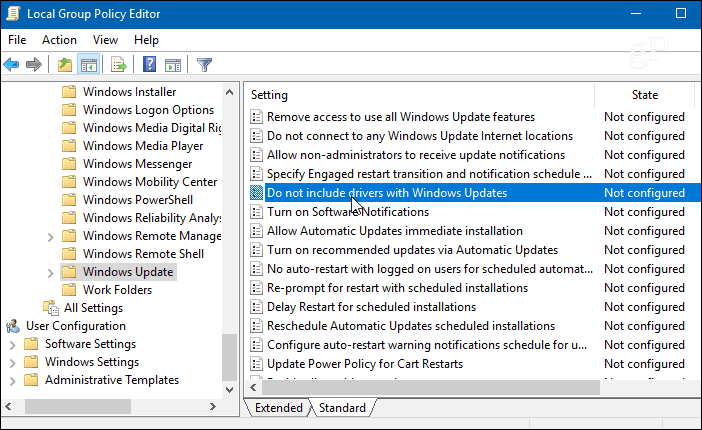
3. As the Local Group Policy Editor opens up on your pc, expand the left section in this manner-

Computer Configuration > Administrative Templates > System > Device Installation > Device Installation Restrictions


Device Isntallation Gpediut


4. When you have reached the location, on the right-hand side, look out for the “Prevent installation of devices not described by other policy settings” policy to modify it.

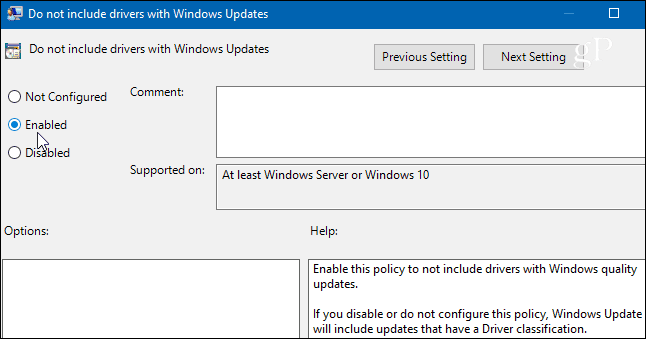
5. Then, right-click on it and click on “Edit” to modify the policy settings.


Prevent Installation Edit


6. In the ‘Prevent installation of devices not described by other policy settings’ window, click on the “Enabled“.

7. To save these settings on your computer, click on “Apply” and then on “OK“.


Eanbled Apply Ok


Close the Local Group Policy Editor window.


Solution 2: Via Device Manager


How to disable auto driver reinstall feature in windows 10

1. Press Windows key + R key together to open Run.

2. Now, write sysdm.cpl in it and click OK.

Press Win + R To Open Run, Type Sysdm.cpl And Hit Eter


3. Click on the Hardware tab.

4. Click on Device installation settings.


Device Installation Settings


5. Choose no.

6. Click on save changes.


Disable Device Reinstall Settings


If you choose to re-enable the inbuilt keyboard, just choose yes in the above screenshot and restart your PC. The keyboard driver will be auto reinstalled.


STEP – 2 Uninstall your laptop-keyboard driver

Uninstalling your laptop keyboard is the next step of this process.

1. At first you need to right-click on the Windows icon on the bottom-left corner.

2. After that, click on “Device Manager” to access it.


3. Then click on the “Keyboards” section.

Here you will see that there are two keyboard drivers.


ADVERTISEMENT

One is the external keyboard driver (For this computer it is termed as “HID Keyboard Device”).

The second one should be your laptop keyboard driver (For this device, it is the “Standard PS/2 Keyboard“).


Standard Keyboard


4. Right-click on your laptop-keyboard driver.

5. Then, click on the “Uninstall“.


Uninstall Keyboard Standard


6. Once you see there is a warning message that has appeared, click on “Uninstall“.


Uninstall Yes


Close the Device Manager window.

Restart your device and after rebooting your computer you will notice that the laptop native keys won’t work anymore.

HOW-TOHow to Stop Automatic Hardware Driver Updates on Windows 10


Stop Automatic Driver Updates Windows 10 Pro

If you’re running Windows 10 Pro, the simplest way to stop automatic driver updates is through Group Policy Editor. Hit Windows Key + R and type: gpedit.msc and hit Enter or click OK.

Then navigate to the following path:

Computer Configuration > Administrative Templates > Windows Components > Windows Update

Then double-click on “Do not include drivers with Windows Update” in the right pane.

Select Enabled on the next screen and then click OK and close out of Group Policy Editor.

Stop Automatic Driver Updates Windows 10 Home

If you’re running the Home version of Windows 10, you don’t have access to Group Policy Editor and instead will need to hack the Registry.

Note: Making changes in the Registry isn’t for the faint of heart. Before making any tweaks in the Registry, make sure to create a Restore Point or do a full system backup first.

To launch the Registry editor, hit the Windows key and type: regedit and hit Enter or click OK.

When Registry Editor opens, head to the following path:

HKEY_LOCAL_MACHINE\SOFTWARE\Policies\Microsoft\Windows

Right-click the Windows key and select New > Key.

Name the new key WindowsUpdate and give create a new DWORD (32-bit) Value of ExcludeWUDriversInQualityUpdate and give it a value of and click OK.

Whether you’re running Windows 10 Home or Pro, after making the changes, you’ll still get regular security and feature updates, but driver updates for hardware will be excluded. Of course, now you’ll need to make sure to keep your device drivers updated manually. Typically you can do that by checking the device’s website or use the update utility that comes with your hardware device. Such as an NVIDIA graphics card, for example.

For the most part, automatic driver updates work pretty well, especially on Microsoft’s own Surface devices. But if you build your own computer, or replace or upgrade hardware, sometimes automatic drive updates can muck up your system. This ensures you’ll be updating your hardware when you’re ready for the new drivers.

How to Disable Automatic Driver Updates Windows 10 through Registry

 ou also exclude driver updates in Windows 10 using Registry, but need to mention that editing the Registry is a risky process, and it may cause errors to your Windows installation if you make some mistakes. You can make a full system backup of your Windows 10 PC before doing this.

Step 1. Open Windows Run by pressing Windows + R keys at the same time. Type regedit and hit Enter to open Registry.

Step 2. Click HKEY_LOCAL_MACHINE -> SOFTWARE -> Policies -> Microsoft -> Windows -> DriverSearching.

Step 3. Double-click DriverUpdateWizardWuSearchEnabled and set the value data as 0. Click OK.

Step 4. Restart your Windows 10 PC and this setting will take effect. If you want to reverse this change, you can go back to Registry Editor and set the value data of DriverUpdateWizardWuSearchEnabled as 1.